

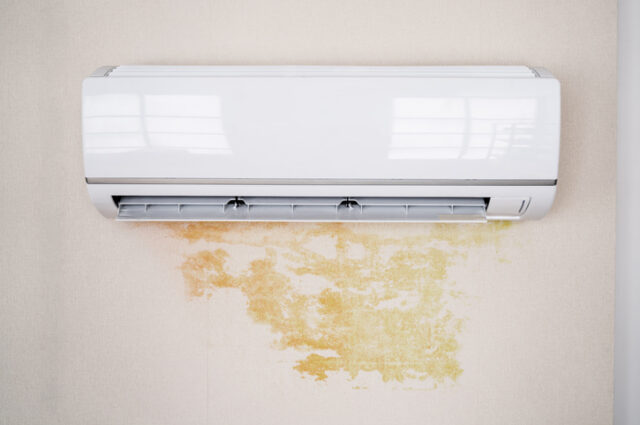
Air conditioners (ACs) have become a vital component of modern life. Comfort in our homes is often linked with the ability to control temperature, especially in the sweltering summer heat or the chilly winter cold. But what happens when your cooling system begins to drip, or worse, leak? Panic not! A leaky AC is a common issue and one that can often be fixed with some simple troubleshooting.
Turn Off the Air Conditioner
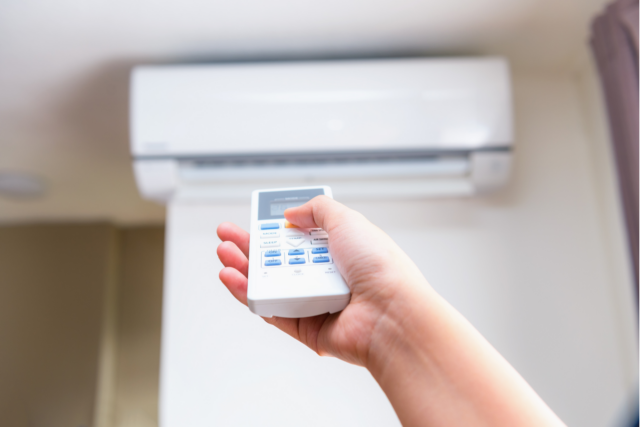
Before embarking on the task at hand, it’s essential to first power down your air conditioning system. Cutting the energy source is not just a safety measure but provides a stable platform to commence the investigative and repair work. An AC unit that’s still running might further aggravate the leak, leading to additional damages.
After shutting down the unit from the main switch or circuit breaker, it is wise to unplug the air conditioner, if accessible. Confirming the unit is entirely disconnected from its power source guarantees that you can work without fear of electrocution or short-circuiting. This step, though simple, ensures your safety and sets the stage for a smooth repair process. If it seems problematic right from the start, call appliance engineers for help.
Locate the Source of the Leak
Finding the source of the leak is like detective work. Begin by visually inspecting the AC unit, both inside and outside. Check for visible signs of water or refrigerant leaks, such as puddles or stains. A flashlight and a keen eye can be instrumental here. Remember, not all leaks are immediately apparent, so take your time.
Should the visual inspection not yield results, you might need to dig deeper. Moisture detectors, UV lamps, or even some soap solution can be used to identify elusive leaks. Don’t worry if you don’t own specialized tools; careful observation and patience can often get the job done. Listen for hissing sounds or look for oily spots, as these may indicate a leak.
Check and Clean the Condensate Drain Line
Your AC’s condensate drain line might be the culprit if you’re facing a water leak. A clogged drain line can cause water to back up and overflow. Examine the drain line for any blockages like algae or debris. The issue could be as simple as a small obstruction causing all the trouble.
Once you’ve pinpointed the blockage, it’s time to clear it out. A wet/dry vacuum is an ideal tool for this task, but in its absence, a stiff wire or a specialized drain line brush can be used. Gently remove the blockage, being cautious not to damage the drain line itself. Flush it with water to ensure it’s entirely clear, and you’re good to go.
Inspect and Replace the Condensate Drain Pan
The condensate drain pan, usually located underneath the indoor air handler, could be another source of leakage. Inspect it for any cracks or damage. Even a hairline crack can lead to a substantial leak over time, so pay close attention.
Should the drain pan be damaged or overly rusted, a replacement might be the best solution. Ensure to pick the right size and type for your AC unit, and follow the manufacturer’s instructions for installation. It’s a task that might seem intimidating, but with careful attention to detail, you can perform this replacement yourself.
Examine the Air Filter
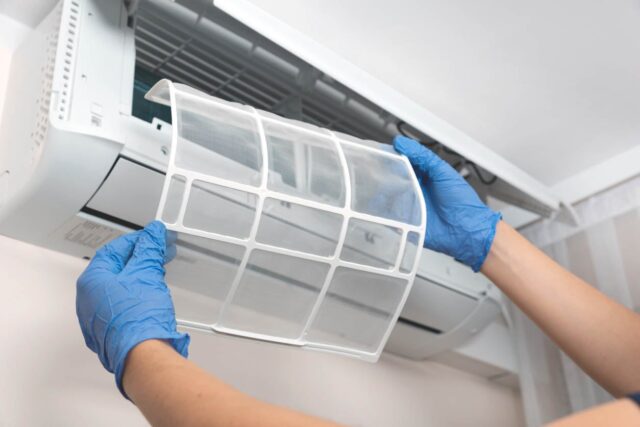
Your air filter might seem unrelated to a leak, but a clogged filter can cause a series of issues, including water leakage. Check the filter for dust, dirt, or other obstructions that might block airflow. This restricted airflow can lead to a freeze-thaw cycle in your AC, resulting in leaks.
If the air filter is dirty, cleaning or replacing it might solve your problem. Depending on the type of filter, you may simply wash it or replace it with a new one. Either way, maintaining a clean air filter is a fundamental aspect of overall AC maintenance, and doing so might just stop that pesky leak.
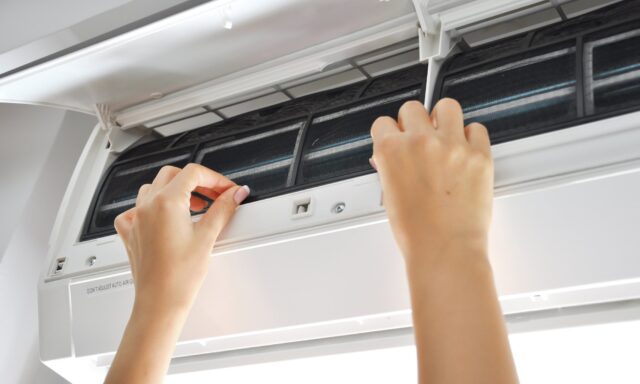
Inspect the Cooling Coils and Fins
Over time, cooling coils and fins might become dirty or bent, leading to a reduction in efficiency and possibly causing leaks. Thoroughly examine these elements for signs of wear, dirt, or bending. These parts are delicate, so approach them with caution.
Cleaning coils requires a gentle touch and a specialized coil cleaner. Following the instructions on the cleaner, gently wash the coils, taking care not to damage them. If fins are bent, a fin comb can be used to straighten them. This detailed care can rejuvenate your AC unit and may solve the leak issue.
Tighten Loose Connections and Fittings
Loose connections and fittings can lead to leaks both large and small. With your AC powered off, examine all accessible screws, bolts, and other fittings. Look for anything that seems out of place or looser than it should be.
Using appropriate tools like wrenches or screwdrivers, tighten anything that seems loose. Make sure not to over-tighten, as this can lead to other issues. This step is often overlooked but can be a straightforward solution to a frustrating leak.
Check the Drainage Slope
The drainage slope of the drain pan plays a crucial role in directing the condensate water away from your AC system. Check to ensure that the slope is guiding the water correctly. Even a small misalignment can cause water to pool and leak.
Should you find the slope misaligned, a careful adjustment might be needed. This task might be complex, so consult your AC’s manual or consider professional assistance if you are uncertain. It’s a subtle aspect, but correcting it might be the key to fixing the leak.
Clear Debris Around the Outdoor Unit
Debris around the outdoor unit can lead to multiple problems, including leaks. Check for leaves, sticks, or other objects that might obstruct the airflow or drainage around the unit. Such obstructions might seem trivial but can have substantial effects.
Clearing the debris is usually a simple task, but it’s an essential one. Regularly check and clean around your outdoor AC unit to ensure that air and water flow remain unobstructed. Regular maintenance here might prevent future leaks and enhance the overall performance of your system.
Test the Air Conditioner and Monitor for Leaks
After all the careful inspection and repair, it’s time to test the system. Turn on your AC and closely monitor it for any signs of leaks or other issues. This is your chance to confirm that all the hard work has paid off.
Don’t just assume that everything is perfect after a brief test. Continuously monitor the system for a few days to confirm that the leak has been entirely fixed. If any issues persist, it might be time to call a professional. Your careful attention here ensures that the problem is genuinely resolved.
Final Thoughts
Repairing a leaky air conditioning system might initially seem like a daunting task. However, with this step-by-step guide, you’ve learned that most issues can be diagnosed and often resolved with careful observation and a bit of handy work. From simple tasks like tightening screws to more complex ones like replacing a drain pan, this guide has covered it all. Whether the problem was as simple as a clogged air filter or as complicated as a refrigerant leak, now you’re equipped with the knowledge to tackle it head-on. Of course, always remember that professional assistance is available if needed.


